
You watch a vendor vlog on YouTube and the booth looks incredible. There are custom wooden shelves, matching table coverings, professional banners, beautiful lighting, coordinated baskets, a rug, expensive display walls and perfectly placed decorations. Then you look at your folding table, inexpensive racks and the products you’ve worked hard to make, and suddenly you start wondering whether you’re ready to sell at all.
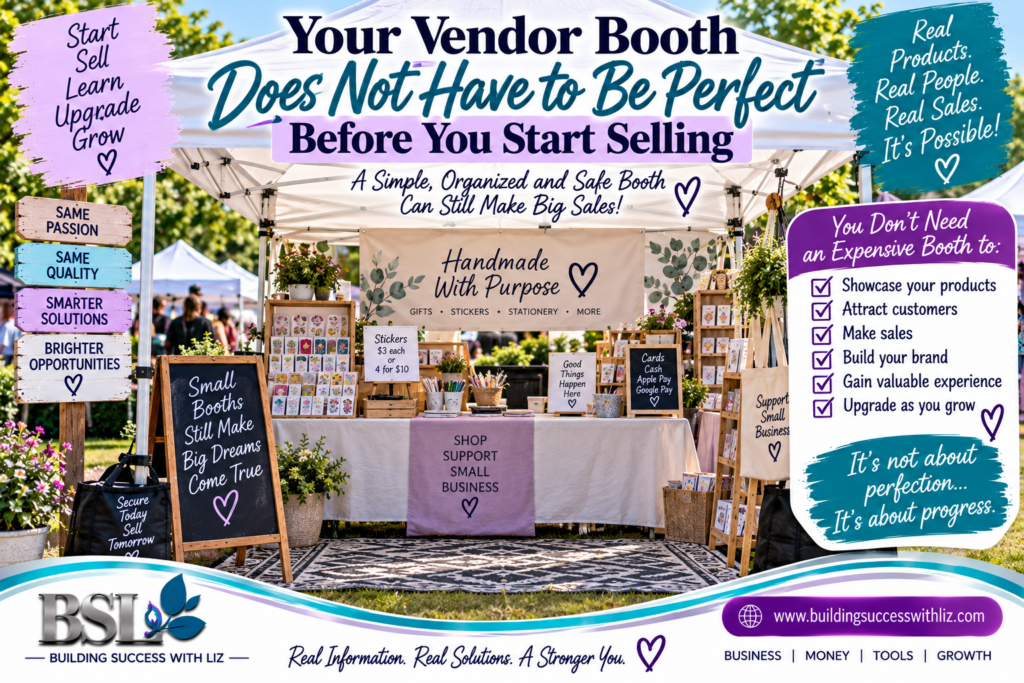
That is one of the biggest beginner traps I want new vendors to avoid. Your vendor booth display does not have to look like someone else’s established business before you attend your first event. You don’t need to spend hundreds or thousands of dollars trying to recreate every booth you’ve saved on Pinterest or watched in a vendor vlog. You can start with affordable equipment, make sales, learn from actual customers and upgrade your booth little by little as your business grows.
That doesn’t mean presentation doesn’t matter. Your booth should be safe, organized, clearly priced and easy to shop, and customers should be able to tell what you’re selling and who they’re buying from. There is a big difference, however, between creating a functional, inviting booth and believing everything needs to be expensive or perfect before you’re allowed to start.
Your Vendor Booth Display Does Not Need to Be Expensive
One of the easiest ways for a new vendor to overspend is trying to build the finished version of the business before making the first few sales. You may convince yourself that you need professional shelving, custom signs, matching storage, decorative walls, a rug and all the other things you see established vendors using.
What you don’t always see is how that vendor started. The beautiful booth you’re watching today may belong to someone who has been selling for five or ten years. Those displays may have been purchased gradually, paid for from profitable events or added after the owner discovered what customers actually needed.
You don’t have to start where another business is today. You need a vendor booth display that works for the business you have right now.
I’ve seen vendors make thousands of dollars using inexpensive display solutions. I’ve also seen beautiful booths that didn’t have enough merchandise to take advantage of the customers walking through them. A display helps present your products, but the display itself isn’t the inventory you’re there to sell.
Don’t Spend All Your Money Trying to Look Ready
Imagine you have $500 available to prepare for your first few events. It would be very easy to spend most of it on shelving, table coverings, signs, decorations, risers and other display pieces before you’ve paid the booth fee or produced enough inventory.
Then event day arrives and you have a beautiful booth with hardly anything on the shelves. If customers actually show up ready to buy, you may not have enough merchandise to take advantage of the opportunity.
A gorgeous display with too little inventory doesn’t solve the problem.
Beginners have to balance presentation with the actual purpose of attending an event. You’re there to sell products, meet customers, learn what people respond to and build your business. A simple, organized vendor booth display with enough appropriate inventory can give you an opportunity to do exactly that.
This is similar to what I discuss in How to Find Your First Customers Without Spending a Fortune. Starting smaller gives you an opportunity to learn what works before investing heavily in equipment you may later discover you didn’t need.
Cheap Displays Don’t Have to Look Cheap
This distinction is important because I’m not telling you to throw merchandise into boxes, write prices on scraps of paper and call the booth finished. The amount you paid for a display doesn’t determine whether your setup can look clean, organized and professional.
Classroom organizers, office organizers, file sorters, baskets, crates, cube storage, pegboards and other everyday products can sometimes become excellent displays. They weren’t necessarily manufactured for craft shows, but if they safely hold the product, make merchandise easy to see and help customers shop, they may accomplish exactly what you need.
Instead of shopping only for products labeled “vendor booth display,” identify the problem first. Maybe you need something to hold keychains, organize stickers, separate sizes, display prints vertically or raise merchandise closer to eye level. Once you know the job the display needs to perform, you can look for an affordable solution.
Don’t shop by the name of the display. Shop by the problem you need it to solve.
My $9 Sticker Display Does Exactly What I Need
I use something designed as a classroom calendar display for my stickers. It isn’t an expensive specialty vendor fixture, and I didn’t buy it because someone told me every professional booth needed one.
I paid around $9 for it after seeing another vendor use a similar idea. That vendor was making more than $1,000 at some events, which was a great reminder that inexpensive equipment doesn’t automatically prevent a business from making money.
The organizer works perfectly for what I need. Customers can see the stickers, everything stays organized and when the last sticker of a particular design is purchased, the backing lets me know that the design is out of stock. I can replenish it when I have more available or make additional inventory when appropriate.
Could I replace it with a $30 or $50 specialty display? Absolutely. But if my $9 solution is organized, efficient and doing the job, what business problem would spending another $40 actually solve?
That’s the question I want beginners to ask before buying displays.
Your Booth Doesn’t Have to Be Perfect, But It Does Have to Be Shoppable
There is another extreme we need to avoid. Saying you don’t need an expensive booth doesn’t mean you can ignore the presentation.
I recently saw an example of a handmade seller who was disappointed because she hadn’t made any sales. Looking at the booth, however, there were several things that could have made shopping difficult. Products weren’t clearly organized, portions of the shelving looked empty, there wasn’t enough signage explaining what was being sold and the overall presentation didn’t communicate the quality of the handmade products.
The seller was also spending much of the time on the phone instead of interacting with people walking by. That doesn’t mean vendors need to chase shoppers down the aisle or pressure everyone who touches something. A friendly greeting, answering questions and simply letting people know you’re available can make a booth feel much more welcoming.
You can absolutely make sales from a simple booth. A confusing booth, however, makes the customer work too hard.
Customers Should Quickly Understand What You Sell
Stand several feet away from your booth and pretend you’ve never seen the business before. Within a few seconds, can you understand what is being sold? Can you locate prices? Can you see the business name? If you decide to purchase, can you tell whether the vendor accepts cash, cards or digital payments?
Those basics matter much more than whether the shelves match the table covering perfectly. Your vendor booth display should help customers understand your business rather than forcing them to investigate the entire booth to figure out what’s happening.
Clear signage doesn’t have to be expensive either. Start with signs that are clean, readable and useful. You can upgrade materials and branding later as your budget grows, but customers shouldn’t have to guess what things cost or how they can pay.
Your Business Name Is Part of Your Display
One thing I think beginners sometimes overlook is that the business itself needs to be visible. You can have beautiful merchandise and an attractive setup, but if customers leave without knowing your business name, you’ve lost an opportunity to be remembered.
A business-name sign or banner placed on the back wall of the booth can be particularly useful because customers can see it while they’re shopping. It may also appear in photographs they take of your products or booth.
I do this myself when I’m shopping at events. If I see something interesting, I may take a picture. When the business name is visible in that photograph, I have a much better chance of finding that vendor again later.
Your business cards, QR code, website or social information can serve the same purpose. A shopper who doesn’t purchase today may still become a customer later, but only if you’ve given them a reasonable way to find you again.
Branding Can Start Simple Too
You don’t need a $300 custom backdrop to tell customers your business name. A clean, readable banner or sign can do the job while you’re getting started.
As your business grows, you may decide to invest in a professionally printed backdrop, branded table covering, larger signs or other pieces that strengthen your presentation. Those can be worthwhile upgrades when they fit the business and budget.
The important thing is that branding should help customers recognize and remember you. I’d rather see a beginner with a simple, readable business sign and organized products than an elaborate decorative wall where I still can’t figure out the company’s name.
Your Tent Is Part of Your Vendor Booth Display
For outdoor events, the vendor booth display begins before we even get to the tables. Your tent is one of the largest and most important pieces of the setup because it defines the selling space, protects merchandise from some weather conditions and provides structure for signs and displays.
Commercial-grade vendor tents can be a worthwhile investment for businesses attending events regularly because they’re generally designed for heavier use. That doesn’t mean a beginner has to stay home because the only thing they can currently afford is a basic canopy from Walmart or another retailer.
Use what you can reasonably afford to get started, provided it is appropriate for the event and allowed by the organizer. Follow the manufacturer’s instructions, inspect the tent before using it and secure it properly every time.
An inexpensive tent that is properly secured is more useful than an expensive tent that isn’t.
Tent Weights Are Not Optional Decorations
A canopy can feel perfectly stable on a calm morning. That doesn’t tell you what will happen if the wind increases, rain arrives or something unexpected happens around the booth.
Tent weights or other permitted anchoring methods should be part of your setup plan from the beginning. Follow the manufacturer’s instructions and the event organizer’s requirements because some venues specify minimum weights or restrict certain anchoring methods.
The same thinking applies to tall shelving, banners, freestanding signs and other displays. Anything that could fall, tip, move or become airborne needs to be evaluated before customers begin walking through the booth.
The ACT Insurance vendor safety guidance recommends stable displays, clear walkways and appropriately weighted tents for outdoor events. The purpose isn’t only to protect your merchandise. An unsecured tent or display can also damage another vendor’s property or potentially injure someone nearby.
Sometimes the Unexpected Really Does Happen
At one of my recent events, something happened that I certainly hadn’t included on my list of things likely to go wrong. A person accidentally hit my tent with her vehicle.
Thankfully, she took responsibility and provided the funds for me to replace the tent. More importantly, my products weren’t damaged because we had taken the time to secure our setup properly.
Another vendor nearby wasn’t as fortunate. Her setup wasn’t secured as well, some of her belongings were damaged and the movement of her setup affected the vendor next to her too.
That experience reinforced something important for me. We tend to think about wind and rain when we’re told to secure a tent, but we can’t prepare only for the things we expect. I wasn’t expecting a vehicle to hit mine that day, but it happened.
You can’t eliminate every possible risk at an event. You can, however, avoid creating unnecessary ones.
Decorations Should Never Compete With Your Products
I once visited a jewelry booth where there were so many decorative stones, sparkling pieces and other objects covering the table that I became confused about what was decoration and what was actually for sale. The booth wasn’t empty or unattractive. The problem was that the decorations were competing with the merchandise.
That’s something beginners can learn from before spending a dollar. Your decorations should help customers notice your products, not make customers wonder which things are actually for sale.
Decorative pieces can create atmosphere and reinforce a brand, but the merchandise needs to remain the star. If customers notice the decorations before they understand what the business sells, the display may be doing more work for the decorations than it is for the products.
Presentation Can Affect Perceived Value
I’ve seen the opposite problem as well. A vendor can have genuinely valuable, well-made merchandise, but the way it’s presented can unintentionally make the products appear inexpensive.
That doesn’t mean higher-priced merchandise requires luxury fixtures. It means products thrown together, partially hidden or displayed without clear pricing and information may make it harder for customers to recognize their value.
An inexpensive vendor booth display can still look intentional. Keep merchandise clean, organize similar products together, give important pieces enough room to be seen and make pricing easy to understand. The goal isn’t to fake luxury. It’s to allow the quality you’ve already put into the product to show.
Don’t Let Empty Shelves Make the Booth Look Abandoned
White space isn’t automatically a problem. Giving products room to breathe can make them easier to see and keep a booth from feeling cluttered.
There is a difference, however, between intentional open space and shelves that look as though everything has already been picked over. If several products sell and you now have three items scattered across a large shelving unit, take a few minutes to reset the display.
Move remaining products forward, consolidate where appropriate and make the booth look intentional again. A functional setup should be easy to maintain throughout the event rather than requiring a complete redesign every time something sells.
Be Ready to Sell When the Event Opens
One hidden cost of a complicated booth is setup time. Every decorative piece has to be unloaded, assembled, arranged and eventually packed again.
If an event opens at 9:00 AM and customers are walking through while you’re still decorating at 9:20, the beautiful setup may already have cost you potential sales. Customers shouldn’t have to wait for you to finish creating the perfect booth before they can shop.
Practice the complete setup at home before the event. Time how long it actually takes to assemble the tent, tables, displays, signs, payment area, merchandise and decorations. Once you’re satisfied with the layout, take photographs from several angles and use those pictures as your setup guide at future events.
Remember that the time you measure at home isn’t the entire event setup time. Parking, checking in, finding your assigned space, unloading and moving equipment from your vehicle also take time. Build in a buffer rather than assuming everything will go perfectly.
Get the booth ready to sell first. Decorate second.
Pack Smarter So You Can Set Up Faster
Once you’ve practiced the booth at home, think about the order in which things need to come out of your vehicle. Equipment required first shouldn’t be buried underneath items you won’t use until the final few minutes.
You might group items by purpose: tent equipment and weights, tables and coverings, displays, inventory, signage, checkout supplies and personal belongings. Your exact system will depend on your business, but the goal is to reduce unnecessary searching and movement.
Working efficiently gives you time to inspect the booth, fix problems, organize inventory and be ready when the first shopper arrives. That’s much more useful than spending the final 20 minutes trying to decide where a decorative sign looks best.
Keep Personal Belongings Away From Your Merchandise
Your purse, food, drinks, jacket, keys and other personal belongings shouldn’t become part of the product display. Create a separate, controlled place for personal items so customers aren’t browsing merchandise beside your wallet or lunch.
The checkout area should also be organized separately. Cash, card readers, bags, receipts and other payment supplies need a location where you can manage them without customers having to reach into your personal space.
If you accept cash, bring appropriate change for your price points and keep the money secure rather than leaving it openly visible. If you accept cards or digital payments, make sure your equipment is charged and consider what you’ll do if cellular or internet service at the event is unreliable.
Display Your Payment Methods
Customers shouldn’t have to ask whether you accept cards. A simple sign showing your accepted payment methods can remove uncertainty before the customer reaches checkout.
This may not be the most exciting part of a vendor booth display, but it supports the thing the booth exists to do: make it easy for customers to buy.
The same applies to business cards, QR codes, packaging and basic pricing signs. None of those pieces need to be elaborate, but together they make the shopping process easier and help the business look prepared.
Your Customer Service Is Part of the Display Experience
You can have the most beautiful booth at the event and still make shoppers uncomfortable if you never acknowledge them. Sitting behind the table staring at your phone for hours can unintentionally communicate that you’d rather not be bothered.
That doesn’t mean hovering over customers or pressuring people to buy. Some shoppers prefer to browse quietly, and they should have space to do that. A friendly hello, a smile and a simple invitation to ask questions can be enough to make someone feel welcome.
Even when a person doesn’t purchase immediately, that interaction can still matter. They may take a business card, scan your QR code, follow the business, return later in the event or remember you when they need something you sell.
A Rug Is Nice Until Someone Trips Over It
A rug can make a booth feel warm and finished, but aesthetics shouldn’t create a safety problem. If the edge curls, shifts or becomes difficult to see, someone could trip.
If you choose to use a rug, make sure it is appropriate for the surface and can be safely secured according to the venue’s rules. The same principle applies to cords, boxes, signs and other objects that could create hazards in customer walkways.
Glass also deserves consideration. Glass shelves and decorative pieces can look beautiful, but crowded events involve people constantly touching products, children moving through booths, uneven outdoor surfaces and unexpected weather. Beginners may find that lighter, sturdier and less breakable alternatives accomplish the same purpose with less risk.
Safety should always come before aesthetics.
Use Vendor Vlogs for Ideas, Not Requirements
Vendor vlogs can be incredibly useful. You can learn better ways to pack, organize products, display merchandise, manage checkout and prepare for long events.
The problem starts when inspiration becomes a comparison. You see an established vendor’s beautiful booth and decide you’re not ready because you can’t afford everything they own.
Remember that you’re seeing that business today. You may not be seeing the folding table they started with, the inexpensive displays they repurposed, how many years they’ve been selling or how many profitable events helped pay for the equipment you’re admiring.
Use those businesses for ideas. Don’t turn their current booth into your entry requirement.
Let Your Booth Earn Its Upgrades
Instead of creating a shopping list based entirely on somebody else’s setup, attend events and watch how customers interact with your own booth. They’ll often show you where your money should go next.
Maybe customers constantly bend down because your best products are too low. A riser or taller display might be the next smart investment. Maybe shoppers repeatedly ask for prices, which tells you signage needs improvement. Perhaps checkout is slow, products are difficult to replenish or a particular display takes far too long to assemble.
Now you’re spending money to solve a problem you’ve actually experienced.
Our Low-Cost Business Ideas guide follows the same general principle: test what customers respond to before scaling your spending. If an inexpensive display continues working perfectly, however, there is no business rule saying you have to replace it simply because you’re making more money.
Efficiency doesn’t become less valuable when your business grows.
Start Simple and Improve What Actually Matters
Your first vendor booth display probably won’t be the booth you use three years from now, and that’s perfectly fine. Your first events are opportunities to make sales, but they’re also opportunities to learn what your business actually needs in the real world.
Start with enough to make the booth safe, organized and easy to shop. Have enough appropriate inventory, clear pricing, visible business information, reliable payment options, basic packaging and a friendly attitude. Secure your tent and displays, arrive early enough to be completely ready and pay attention to how customers interact with the space.
Then improve deliberately. Don’t upgrade because somebody on YouTube bought a new rack. Upgrade because you’ve identified something that can make your booth safer, faster, easier to shop, easier to transport or more effective at selling.
Liz’s Note
My $9 sticker display is a perfect example of why I don’t believe beginners need the most expensive option. It’s a classroom calendar organizer, but it holds my stickers where customers can see them, keeps the inventory organized and makes it easy for me to recognize when a design has sold out. I could spend $30, $40 or $50 replacing it with something officially marketed as a vendor display, but right now that wouldn’t make my system more efficient.
I’ve also learned firsthand why safety can’t be something we add after the booth looks pretty. Having my tent hit by a vehicle wasn’t something I expected to deal with at an event, but because our setup was secured, my merchandise wasn’t damaged. That experience made the reason behind those weights and safety precautions very real to me.
That’s how I want beginners to approach vendor events. I’m not telling you the presentation doesn’t matter, because it absolutely does. I’m telling you that price and effectiveness aren’t the same thing. Make the booth safe, organized and welcoming, invest in enough products to actually sell, learn from every event and let the business help pay for the upgrades that genuinely improve how you operate.
Frequently Asked Questions
How much should a beginner spend on a vendor booth display?
There isn’t one correct amount because every product and event is different. Begin with the equipment needed to safely and clearly display what you sell, then balance additional display spending against inventory, booth fees, packaging, payment equipment, tent safety, transportation and other actual business needs.
Can an inexpensive vendor booth display still look professional?
Yes. An inexpensive vendor booth display can look professional when it’s clean, organized, stable and appropriate for the products. Customers don’t know what you paid for the rack. They experience whether they can see, understand and comfortably shop the merchandise.
Do I need a commercial tent before attending my first outdoor event?
Not necessarily. A commercial-grade tent may become a worthwhile upgrade if you attend outdoor events regularly, but beginners may start with a less expensive canopy when the event permits it. Whatever tent you use should be appropriate for the conditions, inspected before use and secured according to the manufacturer’s instructions and the organizer’s requirements.
Do vendor tents really need weights?
Outdoor tents need appropriate securing even when the weather appears calm. Follow the manufacturer’s instructions and event requirements for weighting or anchoring because conditions can change and an unsecured canopy can create risks for your products, customers and neighboring vendors.
Do I need a rug, backdrop and expensive shelving?
No. Those items may improve certain booths, but they’re not universal requirements for making sales. Start with pieces that solve actual problems for your products and business, and add upgrades when experience shows you they’re needed.
How can I make my event setup faster?
Practice the complete setup at home, time yourself, photograph the finished booth and pack equipment in a logical setup order. Allow extra time at the event for parking, unloading, check-in and unexpected problems so the booth is completely ready before customers arrive.
You Don’t Need the Perfect Booth to Start Selling
The perfect booth isn’t your admission ticket into the vendor world. You don’t need to wait until you own every shelf, sign, rug, tent accessory and display you’ve saved to an inspiration board before you start putting products in front of customers.
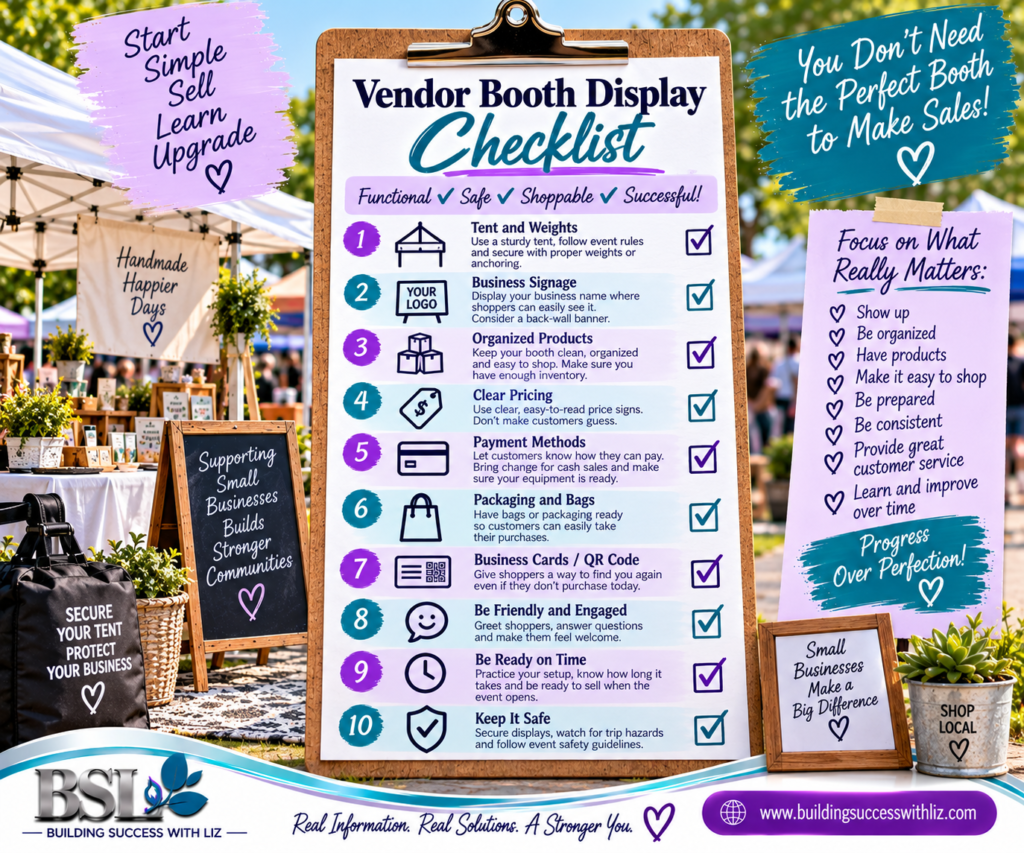
What you need is a vendor booth display that is safe, organized, ready on time and easy to shop. Customers should understand what you’re selling, see what things cost, know who they’re buying from and understand how they can pay. Your tent and displays should be properly secured, your business name should be visible and you should be available when customers need help.
Start with what works. Make your sales, pay attention to customers and learn from every event. Upgrade the things that genuinely need improvement as your business grows rather than waiting at home until you can afford somebody else’s version of the perfect booth.
Your booth doesn’t need to look expensive. It needs to look intentional, work efficiently and be ready for customers.
Let’s Talk About It
If you’re already selling at events, what inexpensive item have you repurposed into a display that works surprisingly well for your business? Maybe it’s a classroom organizer, office supply, crate, basket or something completely unexpected. Sharing that idea may help another beginner realize they don’t need to spend hundreds of dollars just to get started.
If you’re preparing for your first event, what booth purchase do you currently think you have to make before you’re ready? Sometimes another vendor has already discovered a safer, simpler or less expensive solution that will let you start sooner.